“Boeuf bourguignon” + Arduino = “Arduino bourguignon”
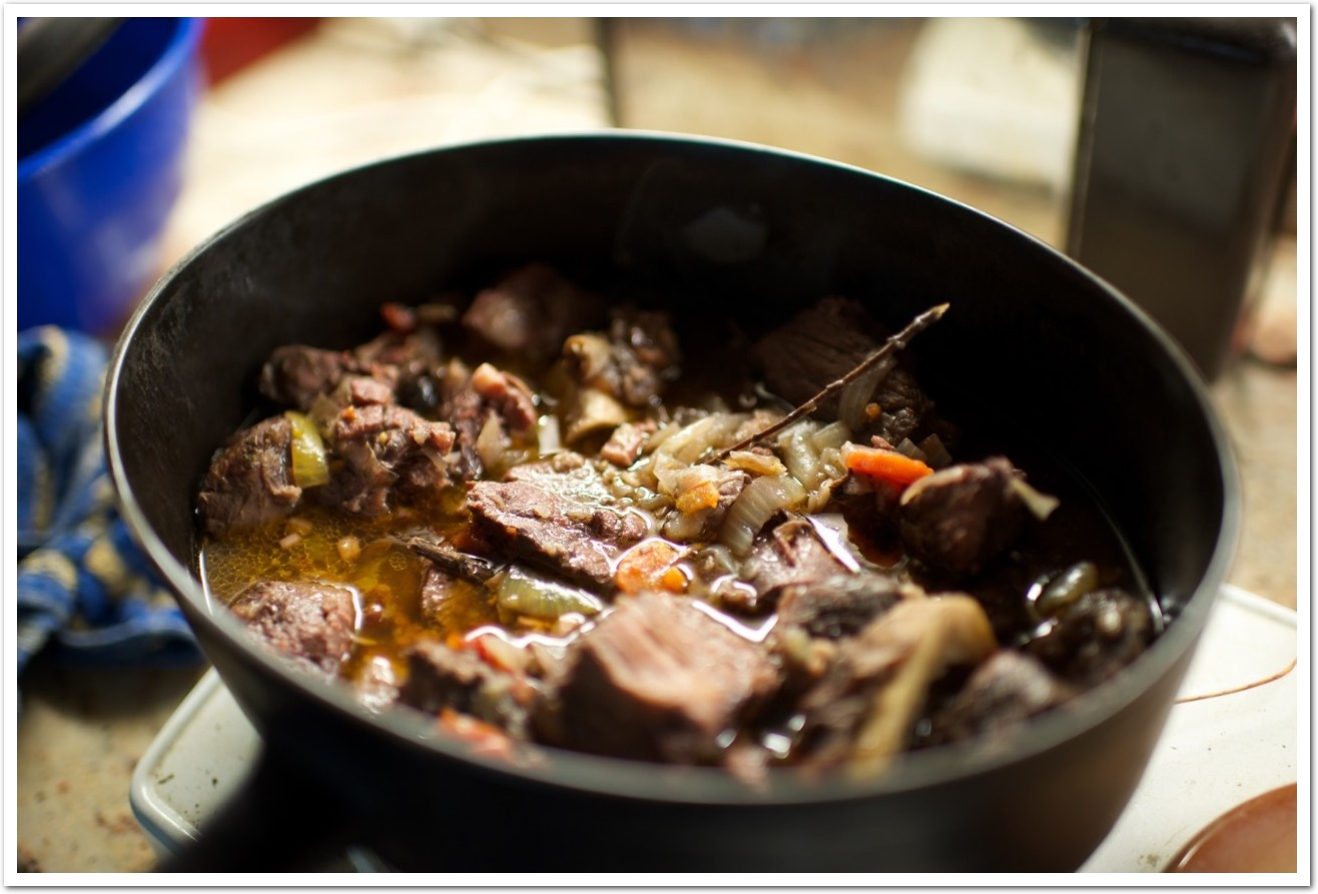
There are probably hundreds way of cooking a boeuf bourguignon. I will give you mine. I won’t claim it is the best bourguignon in the universe but many friends liked it1.
Two key points to my recipe: use good products and cook it many times.
You might have noticed how some dishes get (even) better the next time you cook them. Lasagna is a good example. You definitively want to cook the boeuf bourguignon multiple times. And because you probably have something else to do2 I will describe how to use an Arduino to help with that.
“Arduino bourguignon” recipe

Ingredients
As already stated, the first part of the recipe to make a good boeuf bourguignon is to use good products! I won’t go into the details of how much of every items you’ll need but just give you the list. Remember to prepare it as you would like to eat it and that will be all fine.
- beef meat
- lardons
- wine (using it in a recipe is not a reason to take the worst vinegar you can find in town – a decent Pinot noir is a good start)
- black olives
- garlic
- shallots
- onions
- black pepper
- bay leaves
- carrots
- cherry tomatoes
- mushrooms (Paris mushrooms can do the job, but chanterelle are better here)
Steps
Put everything to marinate all together for a night. You will notice that the surface of the meat already gets the color of cooked meat. That’s only the first time!
In a big cast-iron pan (Le Creuset calls it French oven), put a bit of butter and let the meat (lardons and beef) sear.
Then come the most important part. You will add the marinade to cover the meat and cook everything slowly and multiple times3.
That’s where technology can help you!
Arduino-based cooking assistant
Okay so now, let build our own assistant with an Arduino so we have more time to do other projects and can still eat good meals.
Overview

The requirements for this project are the following:
We want a system that can cook a dish multiple times by itself so we can do something else. To make it more generic, we want to be able to provide the duration and temperature of each steps of the cooking process4.
In term of constraints, the heating system will be an electric hot plate as we can simply switch it on and off using a relay on the power cord. And last but not least, remember we are going to eat what this system will cook.
Design
The design is quite simple. Let’s review the software, hardware designs and the overall UX in the next three sections.
Software
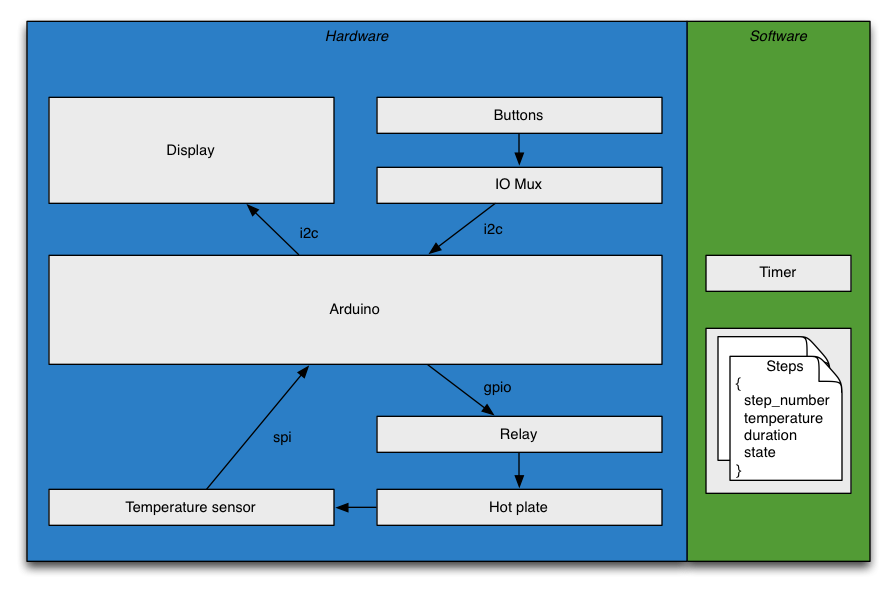
From a software standpoint, we will have a fixed number of steps5. For each step, we will have, its rank, the target temperature, the target duration and a state to denote when it has been completed. The user will be able to navigate in the steps, edit the duration and target temperature of every non-completed steps and see which step is currently active and if the hot plate is on or off. We will use a software timer based on millis() function.
Hardware
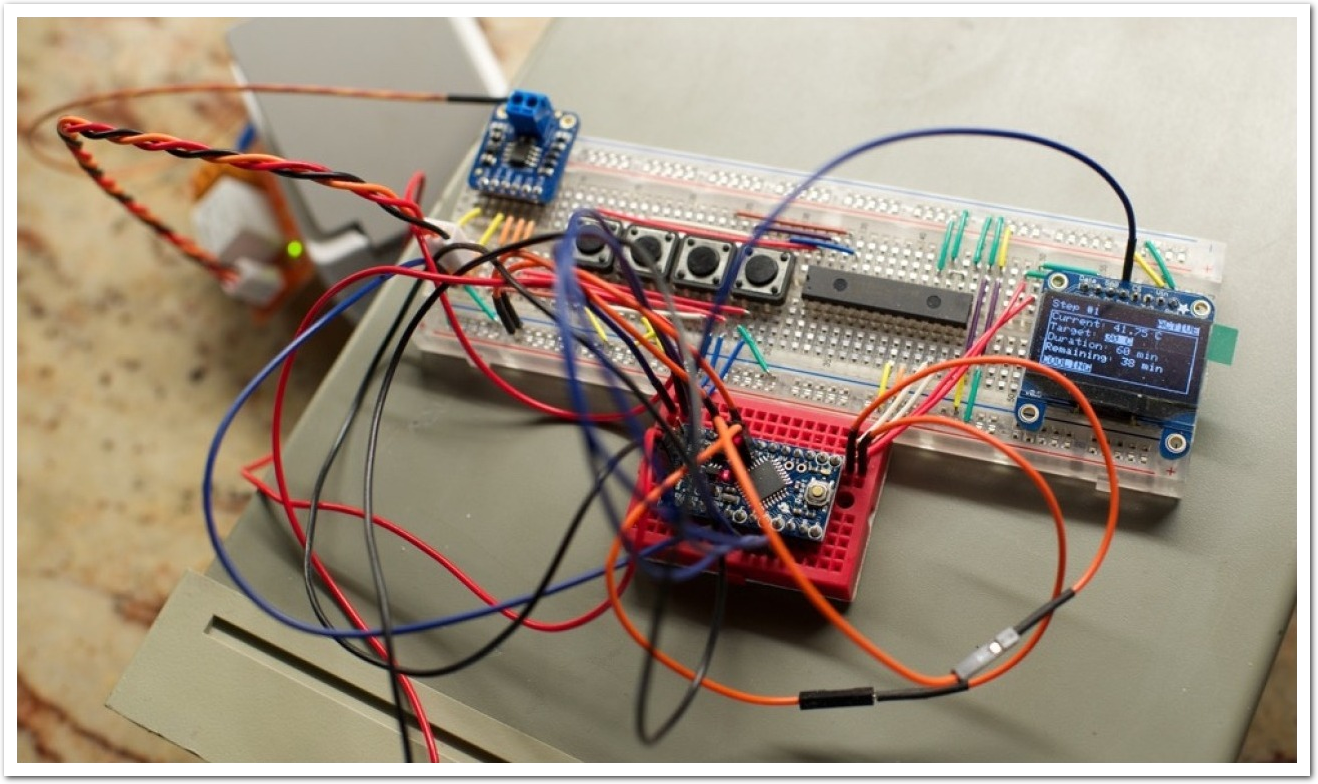
From an hardware standpoint, the design is based on an Arduino Pro Mini 328 which is a small but powerful Arduino-compatible platform (ATmega328@16Mhz for the 5V version, 2KB of SRAM).
The temperature will be measured with a thermocouple because of the high temperature it supports. Because we don’t want anything – beside the pan – to be in contact with the food, the thermocouple will be placed between the pan and the hot plate. We will switch on and off the hot plate with a 250V 10A relay6.
Finally, we will have a display and few buttons for the interactions with the users.
In term of protocols, we will have a mix of interfaces: I2C, SPI and gpio. The display and the buttons (via an I/O expander) will be on a I2C bus. The thermocouple driver has an SPI interface. And finally, the relay is directly controller by a GPIO pin.

UX
In term of UX, since we want to limit the number of buttons, we will use only 4 of them – in a directional keypad manner: left and right button will be used to navigate between the fields of a step and between steps when the first or last field of a step is reached while up and down buttons will be used to increment or decrement values. The display will show the selected ‘step’ with its information (step number, elapsed time, duration, target temperature, current temperature), which field is currently selected, if the currently displayed step is the one active and lastly if the relay is currently switched on or off.
Now that we have a better idea of how we will do it, let review the bill of materials7.
BOM
For this project, I have used the following components:
- 1 Arduino Pro Mini 328 from SparkFun
- 1 Monochrome OLED display breakout board from Adafruit
- 1 i2c i/o port expander – MCP23017 from Microchip
- 1 Thermocouple driver – MAX31855 breakout board from Adafruit
- 1 Type-K thermocouple
- 4 push buttons
- 1 TinkerKit Relay Module from TinkerKit
Once assembled, these modules will need a bit of code to run. Next section will present it.
Code
The code of this project can be found on github: ssoudan/AutoCooker8.
We have a main loop, which:
- read the input from the buttons;
- read the input from the temperature sensor;
- update the internal state;
- update the display;
- update the state of the relay.
Here is what this loop looks like in practice:
/*
  Main loop (called in a loop after setup() has been called)
*/
void loop() {

  // get the state of the buttons from the I2C mux
  boolean button0 = !mcp.digitalRead(7);
  boolean button1 = !mcp.digitalRead(6);
  boolean button2 = !mcp.digitalRead(5);
  boolean button3 = !mcp.digitalRead(4);

  // do the corresponding action
  if (button0) steps.prev();
  if (button1) steps.inc();
  if (button2) steps.dec();
  if (button3) steps.next();

  // read the temperature and update the current step
  // every (TEMPERATURE_READ_COUNT+1) rounds (each round being 100 ms
  // + the duration of I2C operations)
  if (loopCount++ == TEMPERATURE_READ_COUNT) {
    temperatureC = thermocouple.readCelsius();
    if (!isnan(temperatureC)) {
      steps.setCurrentTemperature(temperatureC);
    }
    loopCount = 0;
  }

  // update the internal state of the step holder with regards to the current time
  unsigned long now = millis();
  steps.updateElapsedTime(now);

  // state has been updated, we can now refresh the OLED display with current information
  steps.display(display);

  // we don't want to change the state of the relay too frequently
  if (now - lastChange > MIN_DURATION)
  {
    // if current state of the relay is not the expected one, change it.
    if (steps.isOn() && !lastState)
    {
      relay.on(); // Heating!
      lastChange = now;
      lastState = true;
    }
    else if (!steps.isOn() && lastState)
    {
      relay.off(); // NOT heating!
      lastChange = now;
      lastState = false;
    }
  }

  // sleep a bit (in ms)
  delay(100);
}
Since we have a fixed number of steps, a point to consider is what will happen once the last interval is finished. That’s a serious corner case, we don’t want to burn our “boeuf bourguignon” because of a software bug!
Let check what happen. We can observe in the following code snippet that StepHolder::updateElapsedTime(..) will not update the StepHolder::current_running_step when it is the last one.
void StepHolder::updateElapsedTime(unsigned long millis)
{
    steps[current_running_step].updateElapsedTime(millis);

    if (steps[current_running_step].isDone() && current_running_step < MAX_STEPS - 1)
    {
        current_running_step++;
        // This time update the new running step too.
        steps[current_running_step].updateElapsedTime(millis);
    }

};

boolean StepHolder::isOn() {
    if (steps[current_running_step].isDone())
        return false;
    else
        return steps[current_running_step].isOn();
};
Then StepHolder::isOn() which is called from the main loop to change the state of the relay if required, will return false when Step::isDone() returns true.
Step::done field is initialized to false and updated on calls to Step::updateElapsedTime(..) by setting it to true if the elapsed time is greater than the target duration. Looks like we are all fine the hot plate will be switched off at the end of the steps9.
boolean Step::isDone() { return this->done; };

void Step::updateElapsedTime(unsigned long millis)
{
    if (!this->done)
    {
        if (this->start_time == 0)
        {
            this->start_time = millis;
        }
        this->elapsed_duration = (millis - this->start_time) / 1000 / 60;

        if (this->elapsed_duration >= this->target_duration)
        {
            this->done = true;
        }
    }
}
This code works reasonably well and I have managed to cook a “boeuf bourguignon” with this project, but there is still place for improvements as we will discuss in the next section.
Possible improvements
This project has a wide range of possible improvements. I will list two of them which are related to the egg cooking stuff I briefly mentioned previously in this post.
The idea of cooking eggs precisely at 62°C (143.6°F) is that if you sort egg’s (both white and yolk) proteins by ascending temperature of coagulation, the first you’ll find is 62°C and is for a protein of the white. In other words, if you cook an egg precisely at this temperature, the white will become solid but not the yolk.
In practice this cooking technique is very slow and you have to cook the egg for more than an hour. That’s where this project could also become useful if it was able to precisely control the temperature at 62°C. Unfortunately, my previous experiments have shown that it is not precise enough and temperature tends to overshoot – and in the end the eggs are too much cooked…
I can imagine two ways to improve that: Firstly move the temperature sensor in the cooking water rather than between the pan and hot plate. Secondly, linearize the system and use a PID controller to control the temperature. Currently the hot plate is controlled in a on/off manner (and we don’t let the state of the relay vary too quickly, remember MIN_DURATION). To linearize the system, we could define a period, say 10 sec, and have our PID control how much of this time period the system must be heating to reach the target temperature.
Conclusion
To conclude, this was a fun project to do and I hope this post will give you ideas for the holiday season and feed the hungry maker you are.
Well, friends are not always telling the truth but when it’s about food, it is easy to say if they want to have it again or not :)↩︎
Or because it’s fun to do.↩︎
6 cycles of 1hr-1hr is a good start.↩︎
Ideally, this could also be used to cook eggs at 62 degrees Celsius but temperature measurement is not precise enough.↩︎
Remember the memory is very limited on these platforms.↩︎
This should be enough for the hot plate I have. I encourage you to check the spec of yours and use a suitable relay.↩︎
Some of the components might not be the best for the job, but I had them in stock…↩︎
Build instructions are in the README on github↩︎
The code will not work properly if your steps are longer than 50 days because millis() will overflow.↩︎
